Hey, if you’ve ever spent an hour at the range burning through ammo and chasing a perfect zero, you’re not alone. Most shooters go through three times the rounds they actually need. We’re here to change that. In this guide, we’ll walk you through a no‑nonsense, six‑step method that gets your scope dialed in fast, saves you ammo, and keeps you on target whether you’re at the range or out in the field. We’ll cover proper mounting, boresighting, stable shooting, click adjustments, confirmation, and long‑term maintenance. Let’s get started.
Step 1: Mount and Torque Your Scope Properly
Before you even think about zeroing, your scope has to be mounted right. Loose or uneven rings are the #1 reason zero shifts. Trust us , we’ve seen it happen. A scope that’s not torqued correctly will move under recoil, and your point of impact will wander.
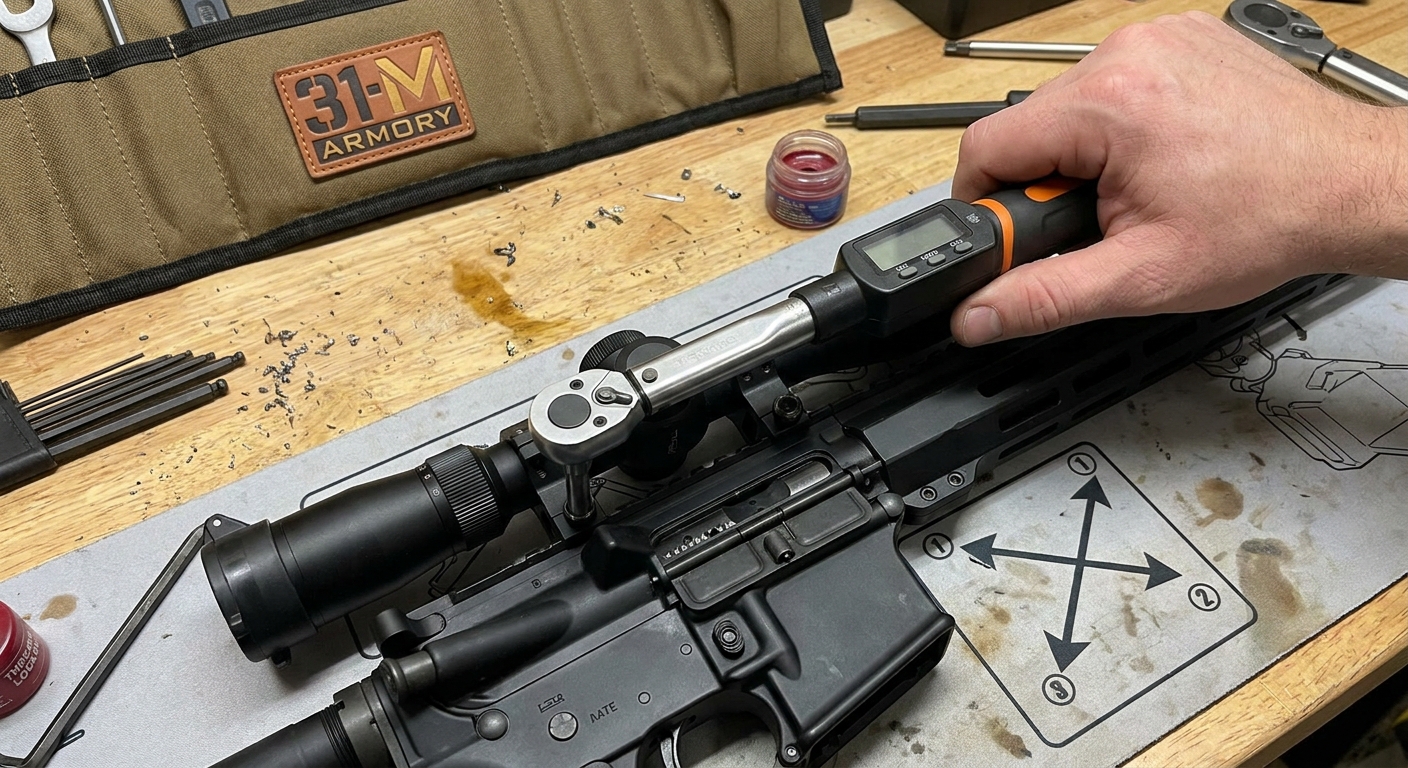
Start by making sure your rifle is unloaded. Secure it in a sturdy rest. Check your base screws first , these attach the rail to the receiver. Use a torque wrench set to your firearm manufacturer’s spec (typically 15, 25 inch‑pounds depending on receiver material). Apply blue thread locker to base screws, but never use red , it’s permanent. For ring screws, do not use any thread locker; torque values are based on dry threads.
Tighten ring screws in a crisscross pattern, a little at a time. Many scopes today require only 15, 20 inch‑pounds. If you overtighten, you can crush the scope tube. Undertighten, and the scope slips. A quality torque wrench is worth the investment. At 31 M Armory we carry scope mounting tools that make the job easy.
Once everything is snug, give it one more pass with the torque wrench. Double‑check all screws. This simple step will save you frustration down the road.
For a deeper look at torque specs, many scope mount manufacturers explain torque values and why dry threads matter. These are trusted sources in the industry.
Step 2: Boresight to Get on Paper
Boresighting aligns your scope’s reticle with the rifle’s bore. It’s not a substitute for live‑fire zeroing, but it saves you from wasting the first few shots. You can do this visually (by looking down the bore) or with a laser boresighter. Either way works.
Remove the bolt (for bolt‑action rifles) or use a bore guide. Set up a target at 25 yards. Rest the rifle securely , a bipod and rear bag are ideal. Look down the bore and center the bullseye. Without moving the rifle, look through your scope and adjust the turrets until the reticle also centers on the bullseye. This gets you close.
If you can’t see through the bore (like on a 10/22), a laser boresighter is your friend. Insert it into the muzzle, turn it on, and adjust your scope to match the laser dot. Keep in mind that laser boresighters have some inherent error, but they’ll get you on paper at 25 yards.
We recommend boresighting at 25 yards because it’s forgiving. Your first shot should land somewhere on the paper. After boresighting, chamber a round and fire one shot. Check where it hits. If you’re way off, re‑adjust using the reticle’s subtensions (we’ll cover that in Step 4).
Remember, boresighting is a rough alignment. It gets you on paper, but you’ll still need to fine‑tune with live fire.
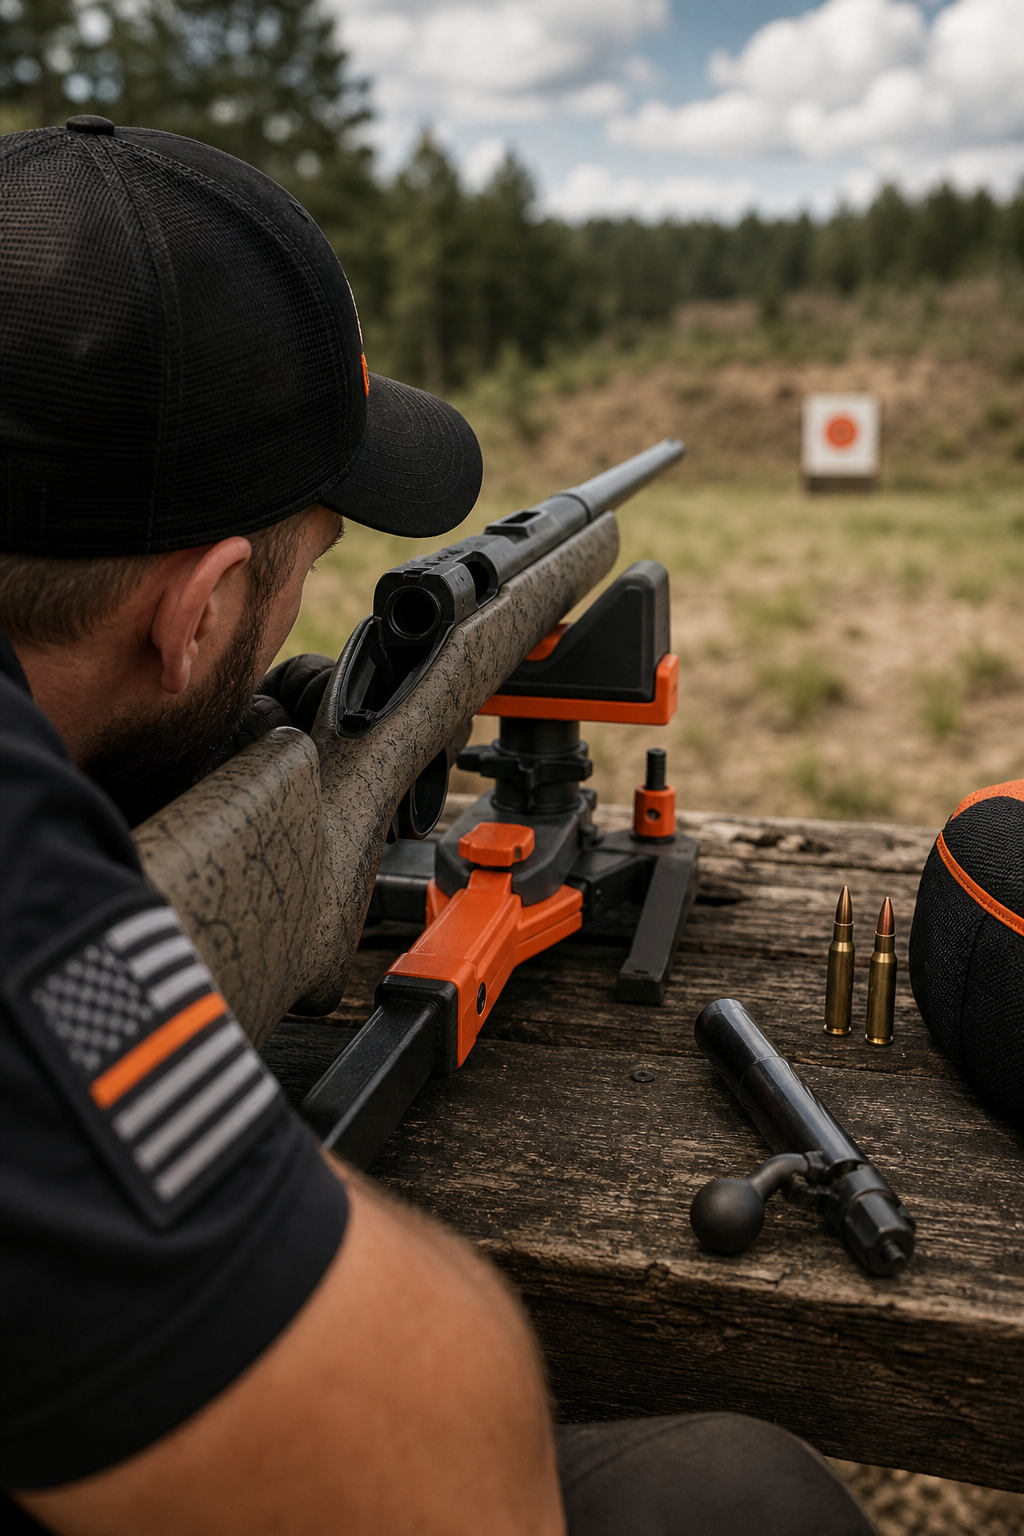
Step 3: Choose a Stable Shooting Platform and Shoot a Test Group
Zeroing requires a rock‑solid platform. You can’t zero off a wobbly bench or with poor support. The goal is to remove shooter error so you’re measuring the rifle’s accuracy, not your own wobble.
Use a bipod up front (a quality bipod, or similar) and a rear bag (sandbag, beanbag, or a purpose‑built rear rest). If you don’t have a bipod, a rolled‑up jacket or a rice bag works in a pinch. The key is that the rifle returns to the same position after every shot.
At 31 M Armory we stock shooting supplies including bipods and bags to help you build that stable setup. Pro tip: fill your rear bag with fine sand for a solid, moldable support.
Once you’re set up, shoot a three‑shot group at your chosen distance. Many shooters start at 25 yards for initial zero, then move to 100 yards for final confirmation. For this test group, aim at the same point for each shot. Let the rifle cool between shots , a hot barrel can shift impact.
After three shots, inspect your group. If the group is tight but off center, you’re ready for adjustments. If the group is scattered, check your equipment , are the rings tight? Is the bipod stable? Are you flinching? Fix those issues before adjusting turrets.
For more on stable platform choices, an online firearms forum has a discussion on bipod and rear bag setups that covers what real shooters use.
Step 4: Adjust Elevation and Windage Using MOA or MIL Clicks
Now it’s time to dial. Most scopes adjust in either MOA (Minutes of Angle) or MILs (milliradians). Know which one you have , it’s printed on the turret or in the manual. At 100 yards, 1 MOA is about 1 inch. 1 MIL is about 3.6 inches. Common click values are 1/4 MOA, 1/2 MOA, or 0.1 MIL per click.
Let’s say you’re at 100 yards, your group is 3 inches low and 2 inches right. If your scope is 1/4 MOA per click, you need to come up 12 clicks (3 inches / 0.25) and left 8 clicks (2 inches / 0.25). Always adjust in the direction you want the bullet impact to move , that’s the opposite of your reticle movement.
Here’s a quick reference table:
Make your adjustments, then shoot another three‑shot group to verify. Fine‑tune as needed. Some shooters prefer to make small adjustments , around 2.6 MOA , for precision. As the research context shows, adjusting to within 2.6 MOA using 2.5 or 2.75 MOA clicks is a granular approach that challenges the idea that bigger adjustments are acceptable.
Remember, always write down your adjustments. A simple log helps you track zero changes over time. If you have capped turrets, set the zero stop after finalizing.
Step 5: Confirm and Fine-Tune Your Zero
After your initial adjustments, it’s time to confirm. Move to your intended zero distance , for most rifles, that’s 100 yards. Shoot a five‑shot group. Five shots give you better data than three. According to SDI’s guide on zero confirmation, five‑shot groups reveal inconsistencies that three‑shot groups might hide. If your group is centered on the bullseye, you’re done. If not, fine‑tune.
When fine‑tuning, make one or two clicks at a time, then shoot another group. Be patient. Environmental factors like wind can throw off a single shot. Always evaluate the group center, not a flier.
Another trick: shoot a cold bore shot first, then a group. The first shot from a cold barrel often lands differently than subsequent shots. If you’re hunting, zero for the cold bore impact.
Once satisfied, record your zero settings. Many scopes allow you to reset the turret dial to zero after adjustments , that way you can always return to this zero without counting clicks. Our friends at 31 M Armory offer a wide selection of scopes and optics if you need an upgrade.
Don’t forget to shoot at least one more group the next day to confirm the zero didn’t drift overnight. Temperature changes can affect point of impact.
Step 6: Long-Term Zero Maintenance and Environmental Factors
Your zero isn’t permanent. It can shift due to temperature, humidity, altitude, ammo lot changes, or even a bump in the field. Check your zero before every hunt or competition.
Make it a habit: shoot a three‑shot confirmation group at your zero distance. If it’s still on, you’re good. If it’s off by a quarter inch or more, adjust accordingly. Keep a logbook with date, ammo type, temperature, and zero settings. This helps you spot patterns.
Environmental factors matter. A drop in temperature can lower your bullet impact , cold air is denser. Higher altitude reduces drag, so your bullet may hit higher. Wind at the range can push your group left or right. When zeroing, try to shoot in calm conditions, or at least note the wind speed.
Another factor is scope creep. Over time, vibrations from recoil can loosen screws. Every few months, re‑check your torque values on base and ring screws. We recommend using quality scope mounts and other optics accessories from 31 M Armory that hold zero better.
If you use a suppressor, it can shift your point of impact. Zero with the suppressor attached if you shoot suppressed most often. Similarly, a change in ammunition weight or brand will likely require a new zero.
Finally, after a heavy cleaning session, fire a few fouling shots to season the barrel before checking zero. A clean barrel often shoots differently than a fouled one.
Frequently Asked Questions
What is the best distance to zero a rifle scope?
The most common zero distance is 100 yards for centerfire rifles. It’s a good balance because bullet drop is manageable and click values are easy to calculate (1 MOA = 1 inch, 1/4 MOA per click = 0.25 inch). For rimfires, 50 yards is typical. You can start at 25 yards to get on paper, then move to 100 yards for final confirmation.
How many rounds does it take to zero a rifle scope?
With proper boresighting and a stable platform, you can zero in 3, 5 rounds for a rough zero, then another 5, 10 for fine‑tuning. Total ammo spent is usually 10, 20 rounds. Avoid the mistake of shooting 40+ rounds without checking adjustments , that wastes ammo and often indicates a different problem like loose mounts.
What does MOA mean on a rifle scope?
MOA stands for Minute of Angle. It’s an angular measurement: 1 MOA equals roughly 1 inch at 100 yards. Scope turrets typically move in 1/4 MOA per click, meaning each click moves the bullet impact 0.25 inch at 100 yards. MOA is the most common adjustment system on American hunting scopes.
Can I zero a rifle scope without a boresighter?
Yes. Remove the bolt and look down the bore to align with the target, then adjust your scope’s reticle to the same point. This is called visual boresighting. Many shooters use this method with good success. Laser boresighters are convenient but not necessary. The key is a stable rest and a target at a known distance.
Why is my zero shifting after I’ve zeroed the scope?
Several reasons: loose scope ring or base screws, temperature changes, different ammunition, or a damaged scope. First, check all screws with a torque wrench. Then, verify with the same ammo used for zeroing. If it still shifts, the scope may have internal issues. Also, ensure your reticle is level , a canted scope can cause horizontal drift as you adjust elevation.
Do I need to zero a scope at the same temperature I’ll hunt in?
Ideally, yes. Temperature affects air density and can shift your point of impact. If you zero at 80°F and hunt at 30°F, your bullet may impact lower due to denser air. For extreme temperature differences, check your zero at the hunting location if possible. Some shooters use a cold‑bore zero and note the temperature in their log.
What’s the difference between first focal plane (FFP) and second focal plane (SFP) for zeroing?
FFP reticles change size with magnification, so the subtensions are valid at any zoom. SFP reticles stay the same size , they are only accurate at a specific magnification (usually the highest). For zeroing, both work fine. The reticle itself is used for holdovers, not for the initial zero. Focus on the turret adjustments.
How often should I check my zero?
Check your zero before every hunting trip or competitive match. Also after any hard impact, after disassembling the rifle, or if you suspect something changed (e.g., new ammo, suppressor removal). A quick three‑shot group at 100 yards tells you if you’re still on. We recommend keeping a log to track any drift over time.
Conclusion
Zeroing a rifle scope doesn’t have to be a frustrating, ammo‑guzzling ordeal. By following these six steps , mount properly, boresight, use a stable platform, adjust with clicks, confirm with groups, and maintain your zero , you can dial in your rifle in under 20 rounds. Every shooter we know has their own routine, but the fundamentals are universal: solid mounting, careful boresighting, and methodical adjustments.
We believe in equipping you with the right gear and knowledge. At 31 M Armory, we proudly serve veterans and law‑abiding firearm enthusiasts. As a veteran‑owned business, we offer a 6% discount to all veterans , because veterans always have our six. When you’re ready to upgrade your scope, mounts, or shooting accessories, browse our selection. We’re happy to guide you through every step. Remember, a well‑zeroed rifle builds confidence and improves accuracy. Improve your time, practice, and enjoy the process.